Vue3.0已经发布,其中新增的Composition API提供了很多新的特性,同时它也使利用Vue编写大型前端项目成为一个很好地选择, 接下来就让我们一同探索一下Composition API的神奇之处吧!
# 创建项目
首先确保你得@vue/cli是最新版本
vue -V。大版本是4即可。然后使用
vue create vue3-demo初始化项目,记得选择vue-router,vuex项目创建成功后进入项目,执行``vue add vue-next`,将项目升级为vue3的项目,等候升级完成之后项目即创建成功。
# setup函数
setup 函数是一个新的组件选项。作为在组件内使用 Composition API 的入口点。
setup 函数会在初始化props就被调动,从生命周期来看,它会在beforeCreated钩子之前调用。
setup 函数中是不能访问this 的。
setup接受两个参数,分别为当前组件的props和当前组件实例。
export default {
  name: 'HelloWorld',
  props: {
    msg: String
  },
  setup (props, context) {
    console.log('props:  ', props.msg) // 可以访问当前组件接受的props
    console.log('context: ', context)
    // context.attrs
    // context.emit
    // context.slots
    // 发出事件放使用context.emit实现
    // 事件的接收方式还和以前一样 @foo
    context.emit('foo','组件触发的消息')
  }
}
2
3
4
5
6
7
8
9
10
11
12
13
14
15
16
17
# 响应式系统api
# reactive和ref
reactive 和 ref 都是用来创建响应式对象的。而不同的是:
reactive用来代理普通对象,实现响应式。ref用来代理基本数据类型,实现响应式,且取值时需要用.value来获取,但是在模板中使用时则不需要加.value。
import { inject, ref, reactive } from 'vue'
export default {
  name: 'HelloWorld',
  props: {
    msg: String
  },
  setup (props, context) {
    // 定义响应式对象
    const state = reactive({
      num: 0
    })
    // 定义基础数据的响应式对象
    const stateRef = ref(0)
    // 按钮点击事件
    const change = () => {
      console.log(state, stateRef)
      state.num++
      stateRef.value++
    }
    // 返回值供外部使用
    return {
      change,
      stateRef,
      state
    }
  }
}
2
3
4
5
6
7
8
9
10
11
12
13
14
15
16
17
18
19
20
21
22
23
24
25
26
27
<template>
  <div class="hello">
    <h1>state.num :  {{ state.num }}</h1>
    <h1>stateRef : {{ stateRef }}</h1>
    <button @click='change'>点击按钮</button>
  </div>
</template>
2
3
4
5
6
7
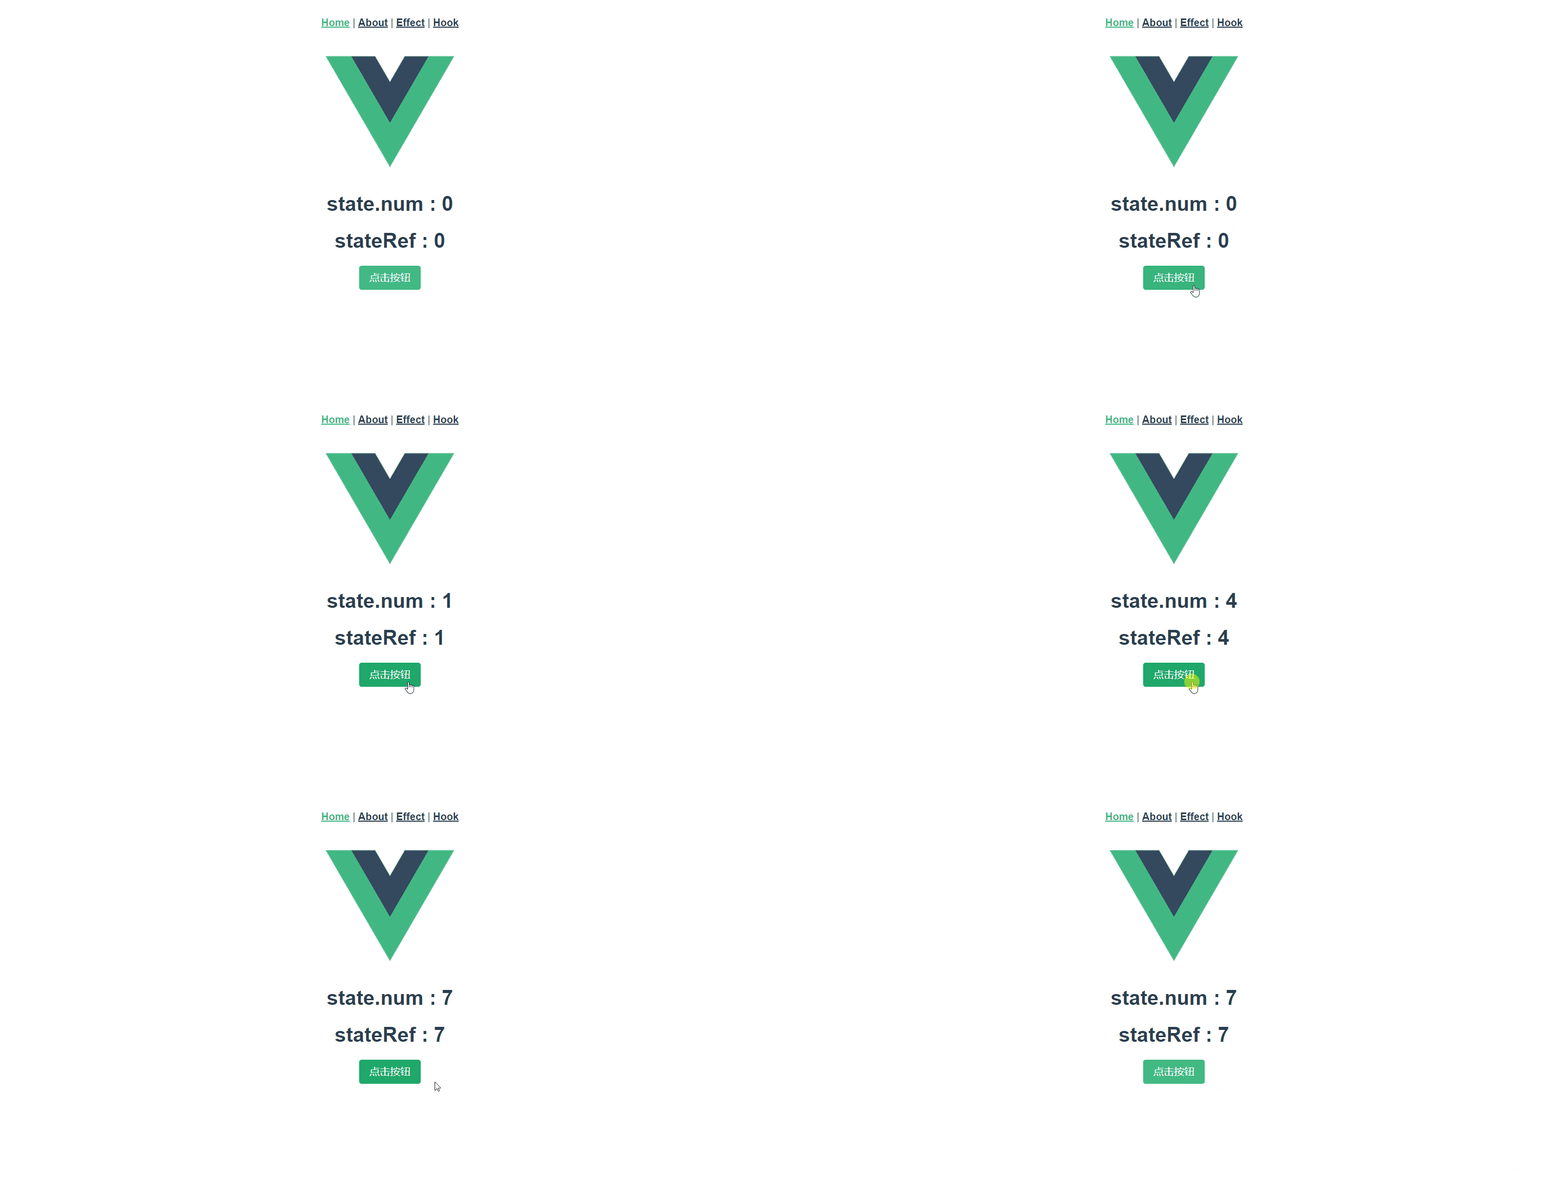
展示效果:
警告
根据官方的说法,ref 是可以接受普通对象作为参数的,它此时会递归为对象的属性添加响应式属性,
而reactive 是无法接受基本数据类型的数据作为参数的,如果这样,会丢失响应式属性。
import { ref, reactive } from 'vue'
export default {
  name: 'HelloWorld',
  props: {
    msg: String
  },
  setup (props, context) {
    let state = reactive(0)
    const stateRef = ref({
      num: 0
    })
    const change = () => {
      console.log(state, stateRef)
      state++
      stateRef.value.num++
    }
    return {
      change,
      stateRef,
      state
    }
  }
}
2
3
4
5
6
7
8
9
10
11
12
13
14
15
16
17
18
19
20
21
22
23
<template>
  <div class="hello">
    <h1>state :  {{ state }}</h1>
    <h1>stateRef : {{ stateRef.num }}</h1>
    <button @click='change'>点击按钮</button>
  </div>
</template>
2
3
4
5
6
7
效果:
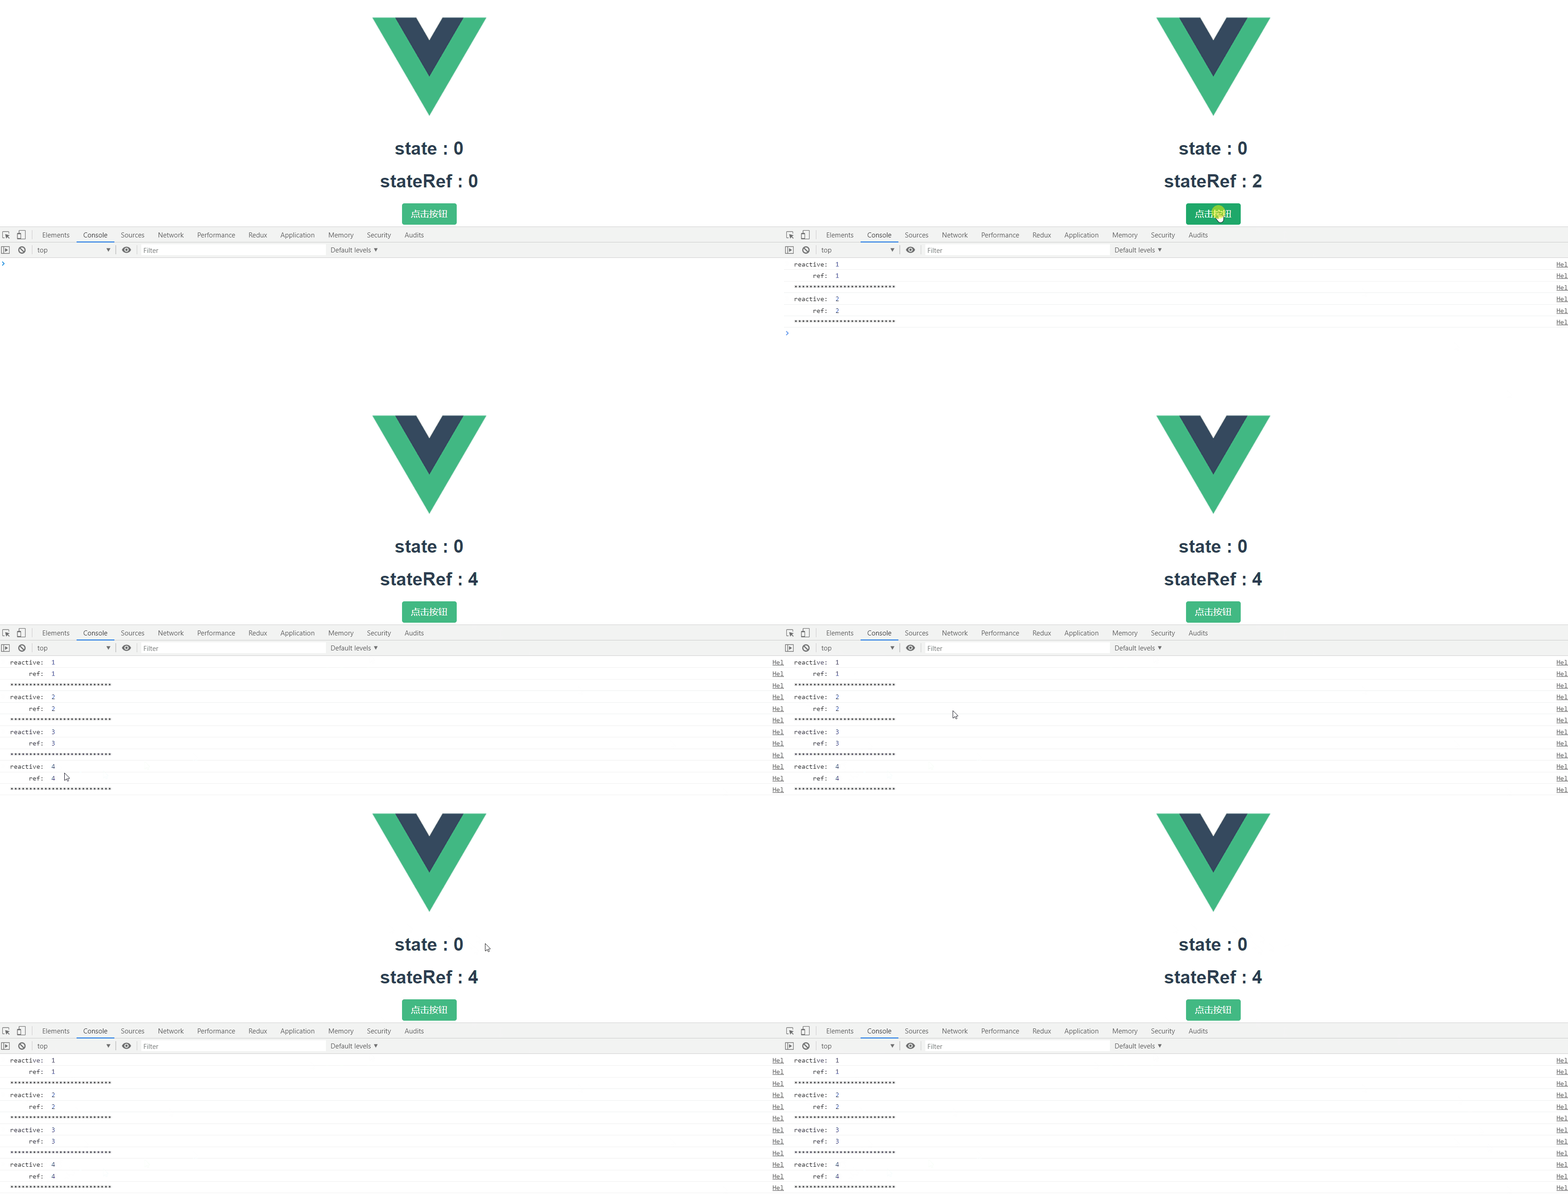
我们可以发现,控制台打印的reactive响应的数据虽然已经变化,但是视图并没有更新,由此可以验证reactive确实是只能接收
普通对象最为参数。
# 计算属性
传入一个
getter函数,返回一个默认不可手动修改的 ref 对象。或者传入一个拥有
get和set函数的对象,创建一个可手动修改的计算状态。
import { ref, computed } from 'vue'
export default {
  name: 'HelloWorld',
  props: {
    msg: String
  },
  setup (props, context) {
    const count = ref(0)
    // 定义一个计算属性
    const countComputed = computed(() => count.value + 1)
    // 自定义计算属性的getter和setter
    const countSelf = computed({
      get: () => {
        return count.value + 1
      },
      set: (val) => {
        count.value = count.value - 1
      }
    })
    const change = () => {
      count.value++
    }
    const restore = () => {
      countSelf.value = 1
    }
    return {
      change,
      count,
      countComputed,
      countSelf,
      restore
    }
  }
}
2
3
4
5
6
7
8
9
10
11
12
13
14
15
16
17
18
19
20
21
22
23
24
25
26
27
28
29
30
31
32
33
34
<template>
  <div class="hello">
    <h1>count :         {{ count }}</h1>
    <h1>countComputed : {{ countComputed }}</h1>
    <h1>countSelf : {{ countSelf }}</h1>
    <button @click='change'>增加</button>
    <button @click='restore'>减少</button>
  </div>
</template>
2
3
4
5
6
7
8
9
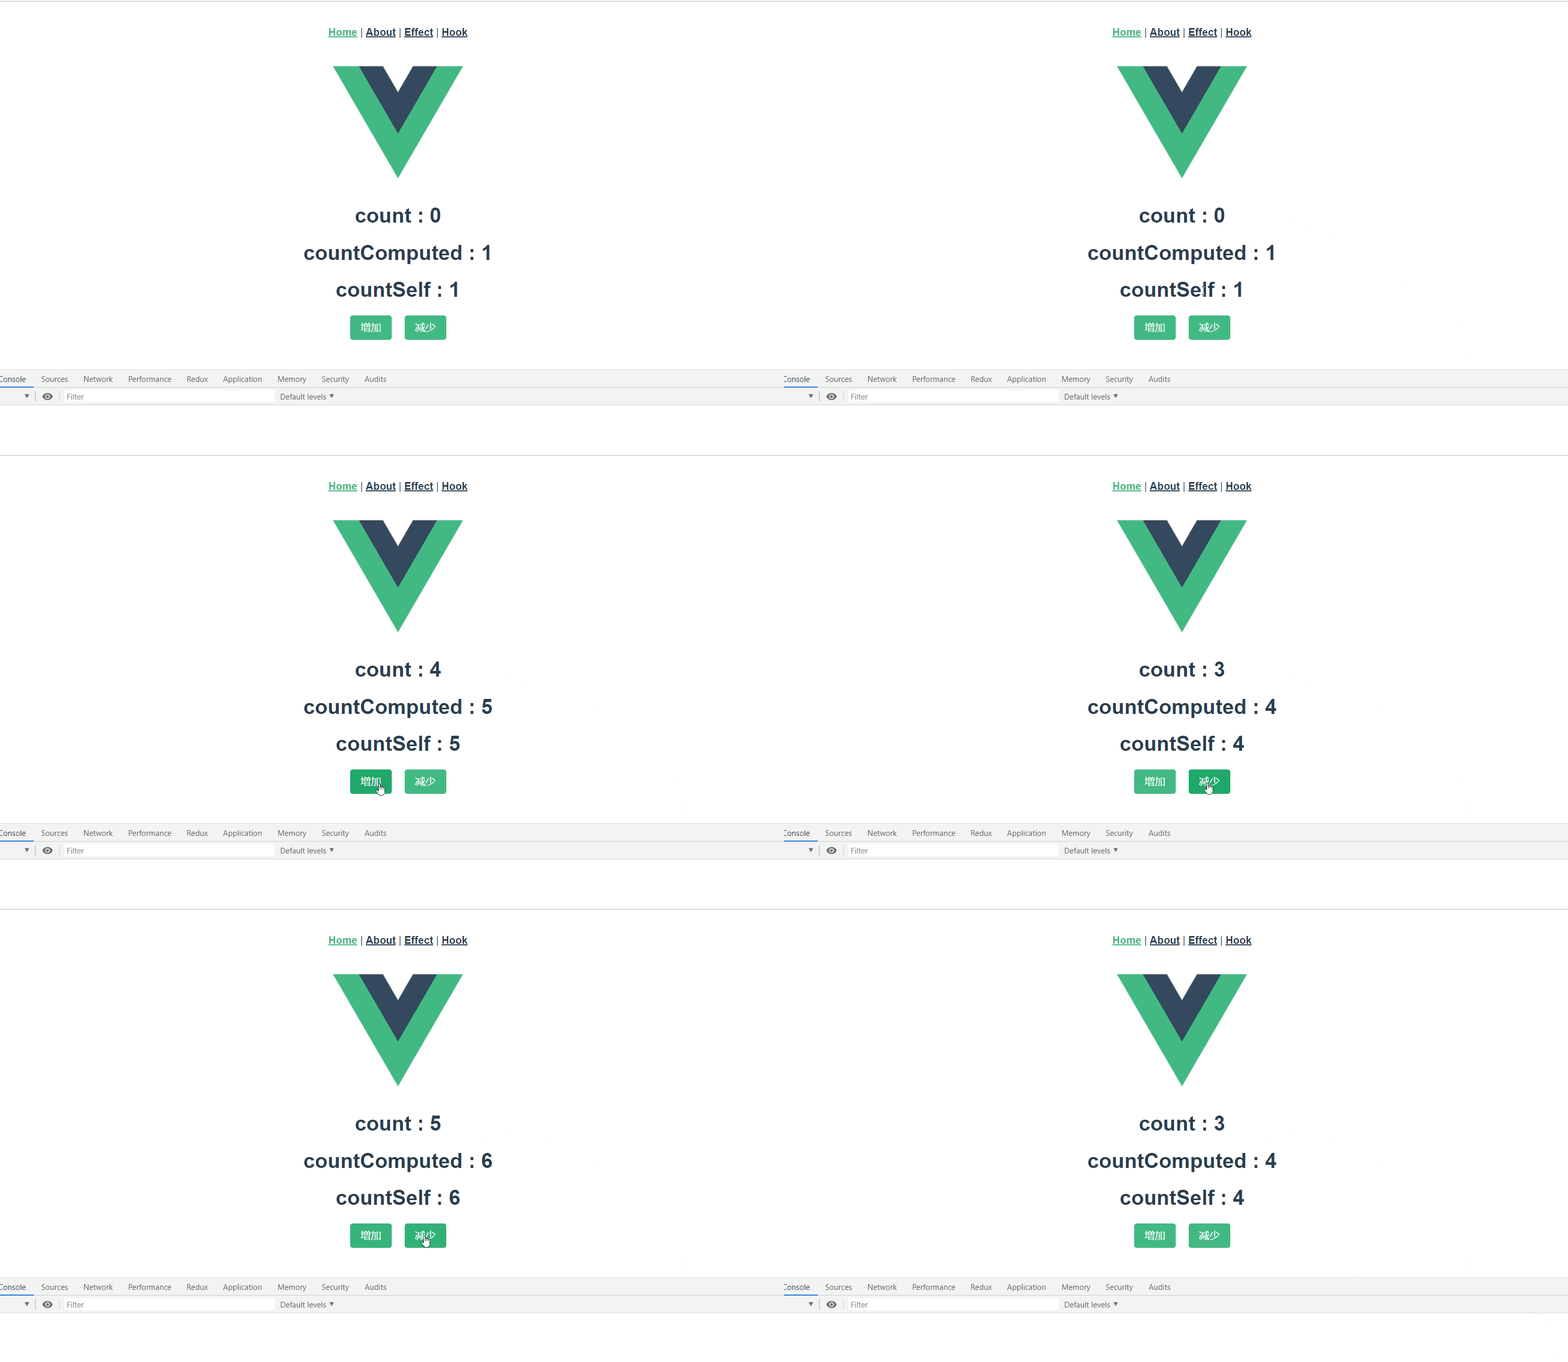
效果:
# watch和watchEffect
watch 与vue2.0中的this.$watch是等效的。watch是懒执行的,可以监听单个或是多个数据源的变化。
- 监听单数据源
// 侦听一个 getter
const state = reactive({ count: 0 })
watch(
  () => state.count,
  (count, prevCount) => {
    /* ... */
  }
)

// 直接侦听一个 ref
const count = ref(0)
watch(count, (count, prevCount) => {
  /* ... */
})
2
3
4
5
6
7
8
9
10
11
12
13
14
15
- 监听多数据源
watch([fooRef, barRef], ([foo, bar], [prevFoo, prevBar]) => {
  /* ... */
})
2
3
4
watchEffect 会立即执行传入的函数,并响应式追踪其依赖,并在其依赖变更是重新执行该函数。
import { ref, watchEffect } from 'vue'
export default {
  name: 'HelloWorld',
  props: {
    msg: String
  },
  setup (props, context) {
    const count = ref(0)
    const num = ref(0)
    const change = () => {
      count.value++
    }
    const setNum = () => {
      num.value++
    }
    watchEffect(() => {
      console.log('count: ', count.value)
      console.log('num: ', num.value)
      console.log('****************')
    })
    return {
      change,
      count,
      num,
      setNum
    }
  }
}
2
3
4
5
6
7
8
9
10
11
12
13
14
15
16
17
18
19
20
21
22
23
24
25
26
27
28
29
30
<template>
  <div class="hello">
    <h1>count : {{ count }}</h1>
    <h1>num   : {{ num }}</h1>
    <button @click='change'>增加count</button>
    <button @click='setNum'>增加num</button>
  </div>
</template>
2
3
4
5
6
7
8
效果: 我们不难发现,当watchEffect 依赖的数据源有一个变化时,就会触发其执行函数。

# 生命周期
可以直接导入 onXXX 一族的函数来注册生命周期钩子:
import { onMounted, onUpdated, onUnmounted } from 'vue'

const MyComponent = {
  setup() {
    onMounted(() => {
      console.log('mounted!')
    })
    onUpdated(() => {
      console.log('updated!')
    })
    onUnmounted(() => {
      console.log('unmounted!')
    })
  },
}
2
3
4
5
6
7
8
9
10
11
12
13
14
15
这些生命周期钩子注册函数只能在 setup() 期间同步使用, 因为它们依赖于内部的全局状态来定位当前组件实例(正在调用 setup() 的组件实例), 不在当前组件下调用这些函数会抛出一个错误。
组件实例上下文也是在生命周期钩子同步执行期间设置的,因此,在卸载组件时,在生命周期钩子内部同步创建的侦听器和计算状态也将自动删除。
与 2.x 版本生命周期相对应的组合式 API
beforeCreate-> 使用setup()created-> 使用setup()beforeMount->onBeforeMountmounted->onMountedbeforeUpdate->onBeforeUpdateupdated->onUpdatedbeforeDestroy->onBeforeUnmountdestroyed->onUnmountederrorCaptured->onErrorCaptured
# 依赖注入
provide 和 inject 提供依赖注入,功能类似 2.x 的 provide/inject。两者都只能在当前活动组件实例的 setup() 中调用。
而且,可以使用 ref 来保证 provided 和 injected 之间值的响应
子组件:
import { ref, inject } from 'vue'
export default {
  name: 'HelloWorld',
  props: {
    msg: String
  },
  setup (props, context) {
    const num = ref(0)
    // num为默认值
    // 如果foo没有被注入进来,则会启用默认值
    const injectValue = inject('foo', num)
    return {
      injectValue
    }
  }
}
2
3
4
5
6
7
8
9
10
11
12
13
14
15
16
父组件:
import { ref, provide } from 'vue'
export default {
  name: 'Home',
  setup (props, context) {
    const count = ref(12)
    provide('foo', count)
    return {
      count
    }
  }
}
2
3
4
5
6
7
8
9
10
11

# 获取dom元素
当使用组合式 API 时,reactive refs 和 template refs 的概念已经是统一的。为了获得对模板内元素或组件实例的引用,我们可以像往常一样在 setup() 中声明一个 ref 并返回它:
<template>
  <div ref="root"></div>
</template>

<script>
  import { ref, onMounted } from 'vue'

  export default {
    setup() {
      const root = ref(null)

      onMounted(() => {
        // 在渲染完成后, 这个 div DOM 会被赋值给 root ref 对象
        console.log(root.value) // <div/>
      })

      return {
        root,
      }
    },
  }
</script>
2
3
4
5
6
7
8
9
10
11
12
13
14
15
16
17
18
19
20
21
22
# 组件通信
# 子组件 -> 父组件
前面我们有说道,子组件通知父组件和vue2中的方式是相同的,知识emit方法现在挂载在setup函数的第二个参数context上了。
子组件:
export default {
  name: 'HelloWorld',
  props: {
    msg: String
  },
  setup (props, context) {
    // 发出事件放使用context.emit实现
    context.emit('foo','组件触发的消息')
  }
}
2
3
4
5
6
7
8
9
10
11
父组件:
<template>
  <HelloWorld msg="Welcome to Your Vue.js App" @foo="handler" />
</template>
<script>
export default {
  name: 'Home',
  setup (props, context) {
    const handler = () => {
      // 添加执行函数
      ...
    }
    return {
      handler
    }
  }
}
</script>
2
3
4
5
6
7
8
9
10
11
12
13
14
15
16
17
# 父组件 -> 子组件
父组件通知子组件的方法有两种
一种是vue系统整体的组件系统的
prop传值,prop变化,自动更新子组件父组件需要执行子组件中定义的方法。则需要借助子组件实例对象来实现。
父组件:
<template>
  <div class="home">
    <img alt="Vue logo" src="../assets/logo.png" />
    <HelloWorld msg="Welcome to Your Vue.js App" ref="childCom" />
    <button @click="add">点我增加</button>
  </div>
</template>
<script>
export default {
  name: 'Home',
  setup (props, context) {
    const childCom = ref(null)
    const add = () => {
      childCom.value.foo()
    }
    return {
      childCom
    }
  }
}
</script>
2
3
4
5
6
7
8
9
10
11
12
13
14
15
16
17
18
19
20
21
子组件:
<template>
  <div class="hello">
    <h1>{{ msg }}</h1>
  </div>
</template>

<script>
export default {
  name: 'HelloWorld',
  props: {
    msg: String
  },
  setup (props, context) {
    const foo = () => {
      console.log('父组件触发子组件方法')
    }
    return {
      foo
    }
  }
}
</script>
2
3
4
5
6
7
8
9
10
11
12
13
14
15
16
17
18
19
20
21
22

# 组合式api实例(VueHooks)
组合式api有很多好处,其中之一就是实现代码复用,有人会过于担心把所有的程序都放到setup函数内,会造成意大利面式的冗长巨大函数,但是,
如果你静下心来仔细阅读官方的初衷,就会发现,其实setup更应该作为一个组装器,它负责组装各个部分,最后返回需要的数据,而各个部分的实现细节可以
抽离出来变成通用函数,这样就可以大大增加代码的复用性。这有点想react的hooks,所以我给他取名VueHooks,下面代码展示下如何组装各个hook。
- 首先创建hook.js文件,这里我们创建两个函数
useCount,useDemo
import {
  onMounted,
  onBeforeMount,
  reactive,
  toRefs,
  ref,
  onUpdated
} from 'vue'

const useCount = () => {
  const state = reactive({
    num: 1,
    count: 3
  })
  const age = ref(18)
  onMounted(() => {
    console.log('我是混入的mount')
    console.log('state: ', state)
    console.log('age: ', age)
  })
  onUpdated(() => {
    console.log('触发更新')
  })
  const add = () => {
    state.count++
  }
  return {
    ...toRefs(state),
    age,
    add
  }
}

const useDemo = () => {
  const state = reactive({
    name: '李华'
  })
  return {
    ...toRefs(state)
  }
}

export {
  useCount,
  useDemo
}
2
3
4
5
6
7
8
9
10
11
12
13
14
15
16
17
18
19
20
21
22
23
24
25
26
27
28
29
30
31
32
33
34
35
36
37
38
39
40
41
42
43
44
45
46
47
- 接下来我们创建index.vue文件,复用刚才创建的函数
<template>
  <div>
    <button @click="add">点我增加</button>
    <h2>{{ num }}</h2>
    <h2>{{ count }}</h2>
    <h2>{{ name }}</h2>
    <h2>{{ age }}</h2>
  </div>
</template>

<script>
import {
  useCount,
  useDemo
} from './hooks.js'
import { ref, onMounted } from 'vue'
export default {
  name: 'Hook',
  setup () {
    const { num, count, add, age } = useCount()
    const { name } = useDemo()
    return {
      num,
      count,
      name,
      add,
      age
    }
  }
}
</script>
2
3
4
5
6
7
8
9
10
11
12
13
14
15
16
17
18
19
20
21
22
23
24
25
26
27
28
29
30
31
32
效果:我们可以发现,生命周期函数和按钮点击事件正常执行了,而我们的setup函数中只是取了数据源用于展示,其中没有其他具体逻辑。
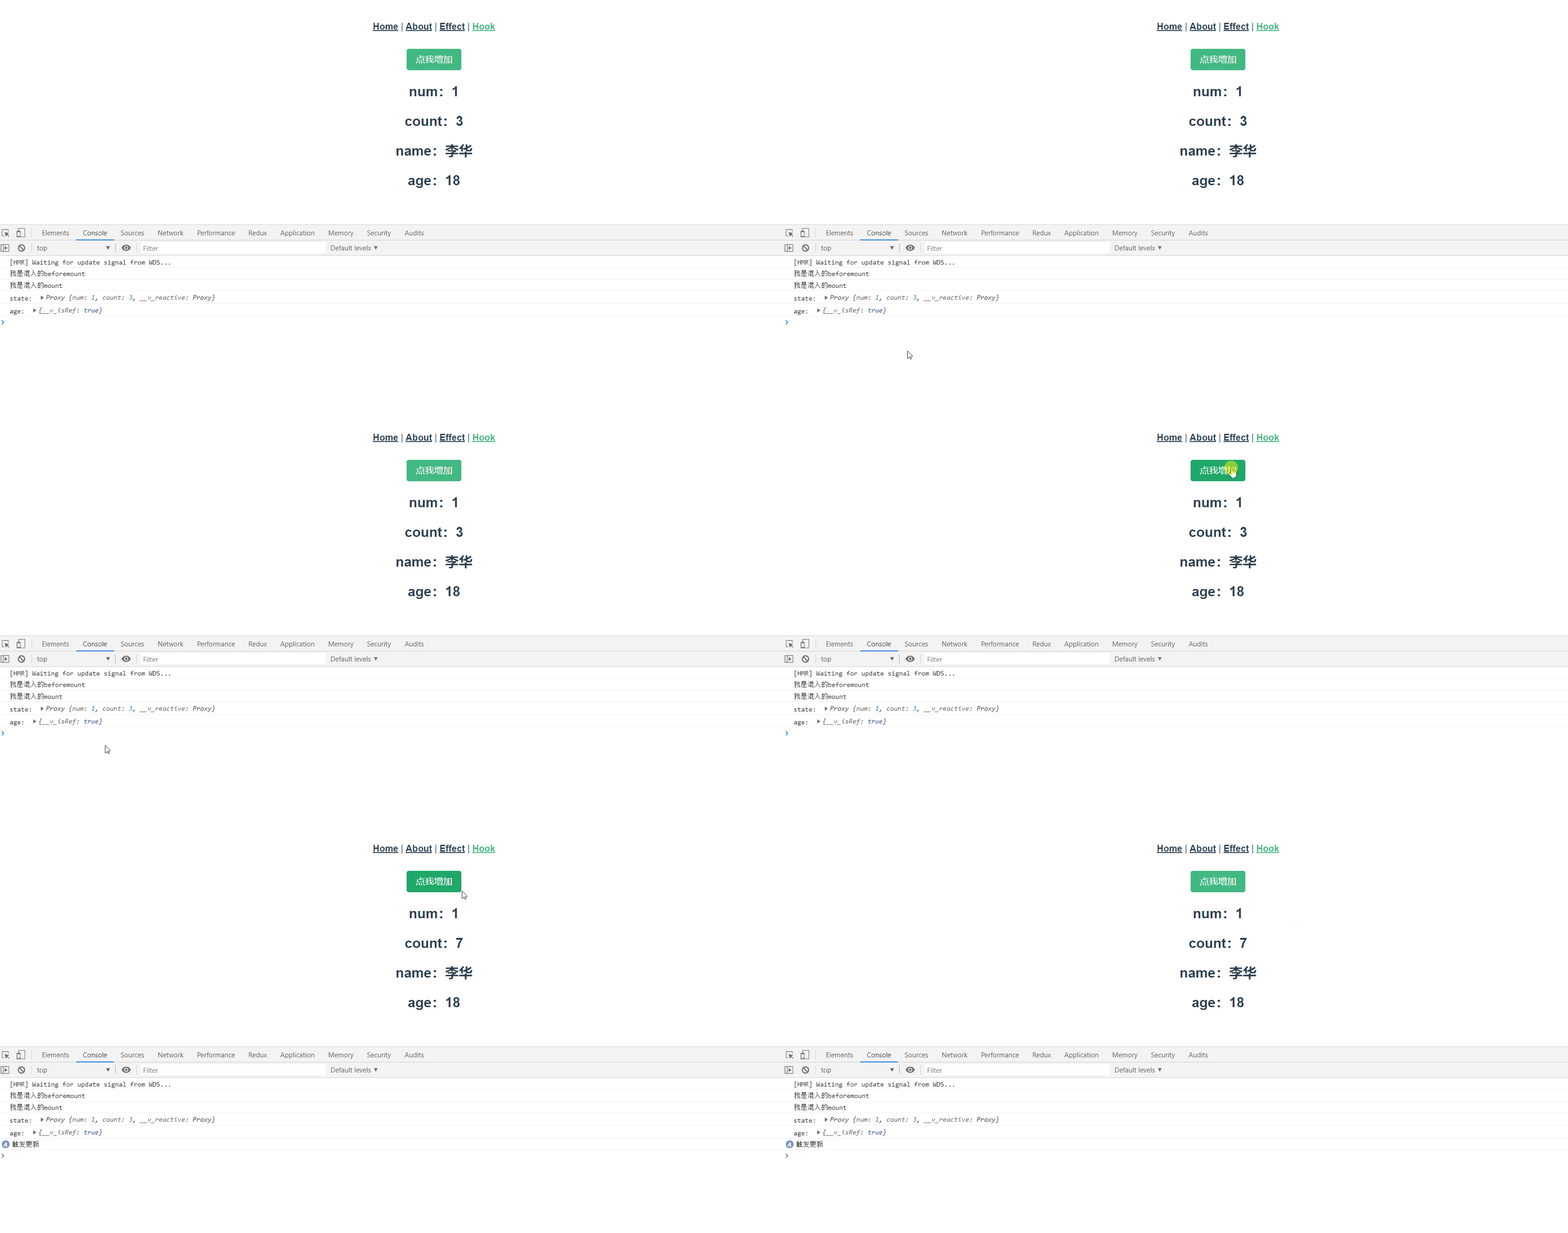
# vue-router和vuex
其实上面的组合式方法提供了另一种书写插件的方法,我们不需要污染vue的实例,我们只需要在我们需要的时候去那就可以了。而且vue-router和vuex也是这样做的。
<template>
  <div class="about">
    <h1>This is an about page</h1>
    <h2>{{ count }}</h2>
    <button @click="add">点我使用vuex增加</button>
    <button @click="go">点我回首页</button>
  </div>
</template>

<script>
import { useStore } from 'vuex'
import { computed } from 'vue'
import { useRouter } from 'vue-router'
export default {
  name: 'About',
  setup () {
    // 拿到store中的数据
    const store = useStore()
    // 注册store中的数据为响应式的
    const count = computed(() => {
      return store.state.count
    })
    const add = () => {
      store.commit('addCount', 1)
    }
    // 拿到路由对象
    const router = useRouter()
    const go = () => {
      router.push({
        name: 'Home'
      })
    }
    return {
      add,
      count,
      go
    }
  }
}
</script>
2
3
4
5
6
7
8
9
10
11
12
13
14
15
16
17
18
19
20
21
22
23
24
25
26
27
28
29
30
31
32
33
34
35
36
37
38
39
40
41
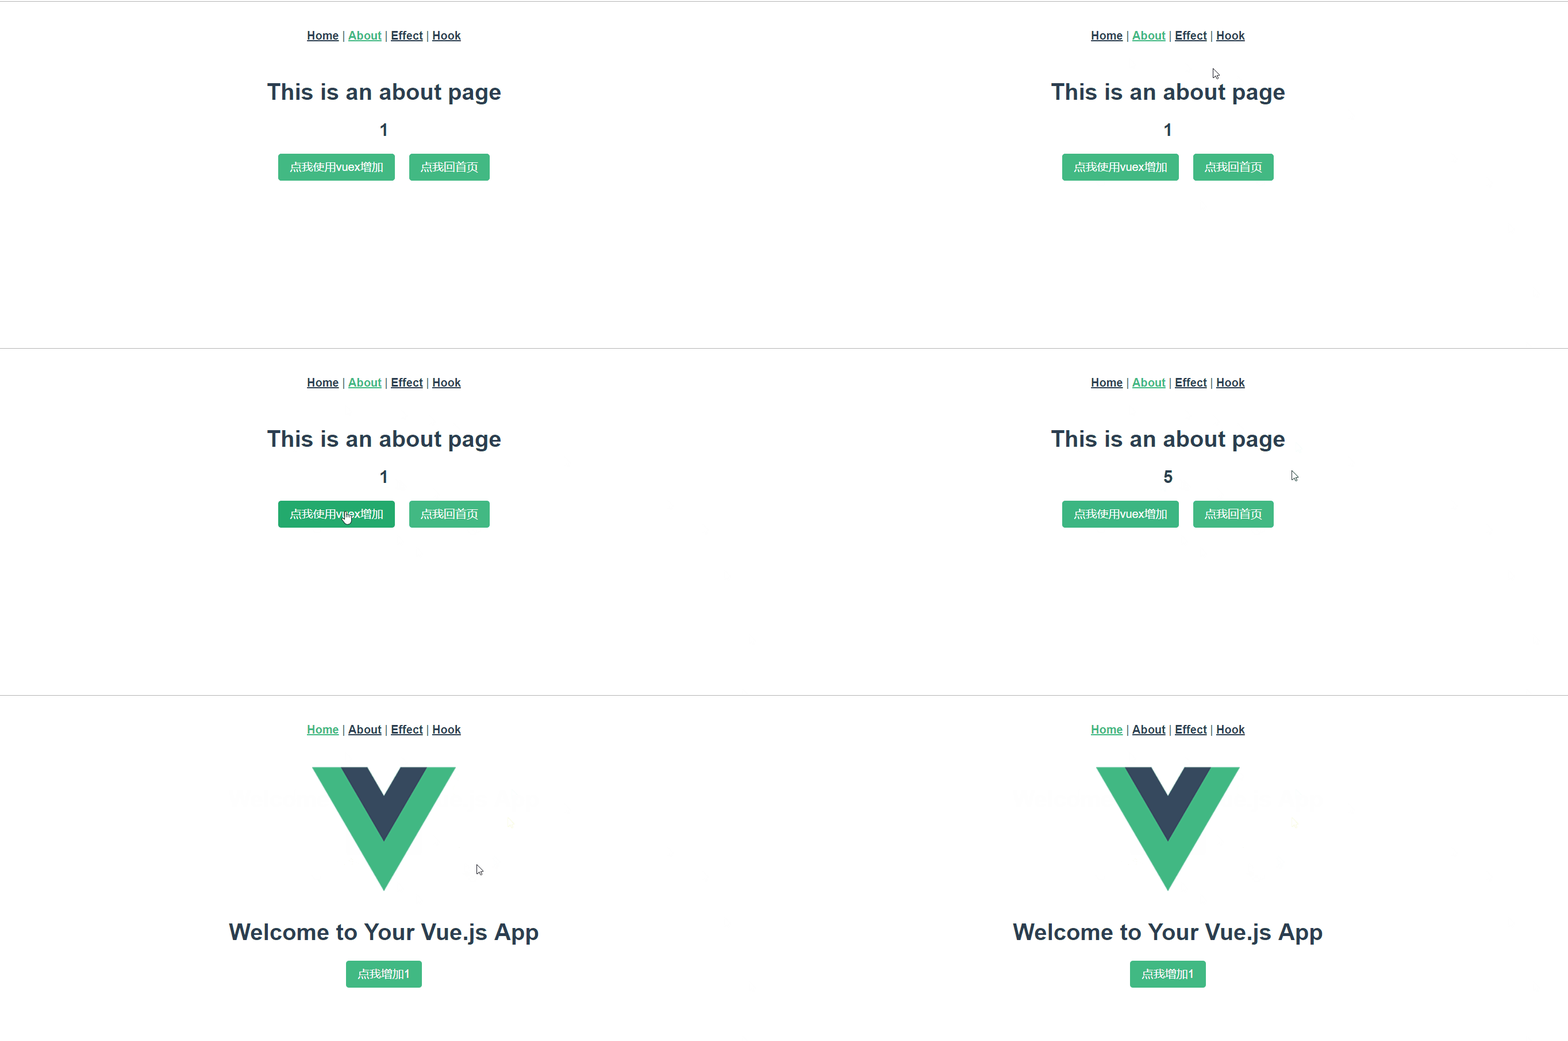
效果:
